![](https://blogger.googleusercontent.com/img/b/R29vZ2xl/AVvXsEidgTEiOE1FZCqWKFefVFHA0UdtwtBfYEctFSg1h_Vj_gQbTKfXsIZdZBKKTzpeFrVa1s9_HpM3Zt3DM9amYmS6NHiplIGmrQJqhtUrXYbW9D0v4dIBW-3nXu5LeNSY85Nb4yyhNtglyNc/s640/IMGP0002.JPG) |
I have cut out the headband and body pieces from sheet metal. Next, I applied the ball-bearings to the hexagonal nuts. |
![](https://blogger.googleusercontent.com/img/b/R29vZ2xl/AVvXsEiAW_c2EZvXkhhw6zGxdk1DNvKqR7IjV_kgSmNaL-dnaXpsOsyijEJqPi2ayU9P3MhJqQDO9GyRdlWnM5ASc1r07J7ejkqjcSY3hgsn3ovEiY5uH6ICeeVigh4oKaOitXiT-rNAwf3GhtI/s640/IMGP0004.JPG) |
I have selected some scrap pieces that I think would make a good body. I then make them out of cardboard to see what it will look like when welded together. |
![](https://blogger.googleusercontent.com/img/b/R29vZ2xl/AVvXsEi7tbHnM0x9i_miAbXwr2vbu5xcoh3O8FLOm5wR0Gwjx5CL199pUnedYkukUvH6uapq8vXCcvrXkjWFPJ5YemRgiNV-1OqiXajW19B-fXUHLKYSWrKXjXE77_BQdMwCdfm4AlASXbYLNG8/s640/IMGP0005.JPG) |
Buffing the body plate. |
![](https://blogger.googleusercontent.com/img/b/R29vZ2xl/AVvXsEhhb_srnrPpj3g3cKBqukPbW3OR63nXSb9_ITYgKaA1cCnlLFu6vzPQdL_qtqRBYzxiyWtGxxelv8qEJl3hyphenhyphenHpXDECLISKmd8WEcxR_Ys913lbrOLNNXfqMunFD9OTwSzGh_s7BH_nIOis/s640/IMGP0007.JPG) |
This is what the metal pieces should look like when assembled. |
![](https://blogger.googleusercontent.com/img/b/R29vZ2xl/AVvXsEhFMeccJGfJTb7KhaH5QFF-BPNGnGgMzmFN2RGhpj0ZNMr05pCcLpxalbn4X0TfsquMVAMZUP-_0T6ymHqM40gGbIi3MGIXuepv_IqlqQQ9yHP9q71NzY4UF_7OtOxH73jpmG9rYv7oV80/s640/IMGP0006.JPG) |
What it should look like when added to the head piece. |
![](https://blogger.googleusercontent.com/img/b/R29vZ2xl/AVvXsEjaZYEuB3UlDOeixFwCotUbefOiNzcerenQKSFr76ontgOcmT6vy49xFXjg3k7t6gh0ih-WptZ-WPx7EZYhovvH-cRREHQcGP3dPVCh6KhgWQ_XmIAjKFEQQ8v620YAe-P8PTAauAU867Y/s640/IMGP0008.JPG) |
To the left you can see the metal body is made and the legs are in progress. |
|
Welding the legs together. I am using a spring, because it seems appropriate for its 'springy' legs.
I am using these metal blocks to keep the legs pieces secure. All ready to weld. |
![](https://blogger.googleusercontent.com/img/b/R29vZ2xl/AVvXsEjZayUaEbmtA57Vj8UP7gzipxpq_79-iiCP1WXOtDTT9gPjijV9n4xyud_v6YgzbDkPOifguHjGefCTZTfWtfrgwn_n8Ru7zYgszWh5I8jhXC9-SHzc1GWNUoUkOFBARKHqq0X4J5PfeZA/s640/IMGP0011.JPG) |
The legs are assembled. So I am now attaching them to the body piece. |
![](https://blogger.googleusercontent.com/img/b/R29vZ2xl/AVvXsEj0dftsZ5-dbkgw77G_Nq_afW7wov4KbJDuQJ62-p8nbg_cAbFdQGYJU7oy4KAIi95CRcWSeenuIEnkTzwOTCkECMvcHNhwXo5U6wcEMIZMSW6zsoFGnaxSiCDPkrC23K62q5QfCry7S5o/s640/IMGP0012.JPG) |
The legs and body are standing. |
I am going to use nails to create the feet, so I am buffing them to make them shiny. |
Assembling the feet.
I am going to grind the heads of the nails down, using the bench grinder. This means it will have a flat surface, so I can apply the feet I have made.
Assembled body and legs. They are standing very nicely on the bench.
![](https://blogger.googleusercontent.com/img/b/R29vZ2xl/AVvXsEhtlu0M5kVfrf-aLA90hwb_MKITpSQPWLPh0RptifbJTI5NvR7UyPDTgSswkJXCeW4nPazheWy7jLNfIqkO_4ZS8qGQfEFG3nHFI2NGjrcE1yBZC8WEwGfbS4xnPR7_NsuO6vkCXhjNRfw/s640/IMGP0016.JPG) |
I now bring the head piece and join it with the legs. |
![](https://blogger.googleusercontent.com/img/b/R29vZ2xl/AVvXsEg83jWuMW2_9NPJOQg5oZO3KrRKWWDr25QJhqRsUlSoWsIyyyKqzGeMlnQRpgqcuDmlHp6db93rWG1n6Pd6XjSzKquvNdqXo3fnlNVVCkbGUqleTyLoDlKL19xPs5K1O3WVGLvxqRBV-gU/s640/IMGP0018.JPG) |
The body is joined. You can see the clamp I am using to hold it together. To the right you can see a little model wren that I have found very useful when figuring out the proportions and dimensions. |
![](https://blogger.googleusercontent.com/img/b/R29vZ2xl/AVvXsEgdcV22pYuHsSlLLY8eVhmmtPJZkiLy1vM4xTWEjZDTo7wiMrKW_t8d0ksEy80mi0_R1_Zl6sJrZka5_b-kahfEcDhM_ifLTket8FetkpLhcoDj0_h__iJog-K4kG3_OM57aQFJVV2of0c/s640/IMGP0019.JPG) |
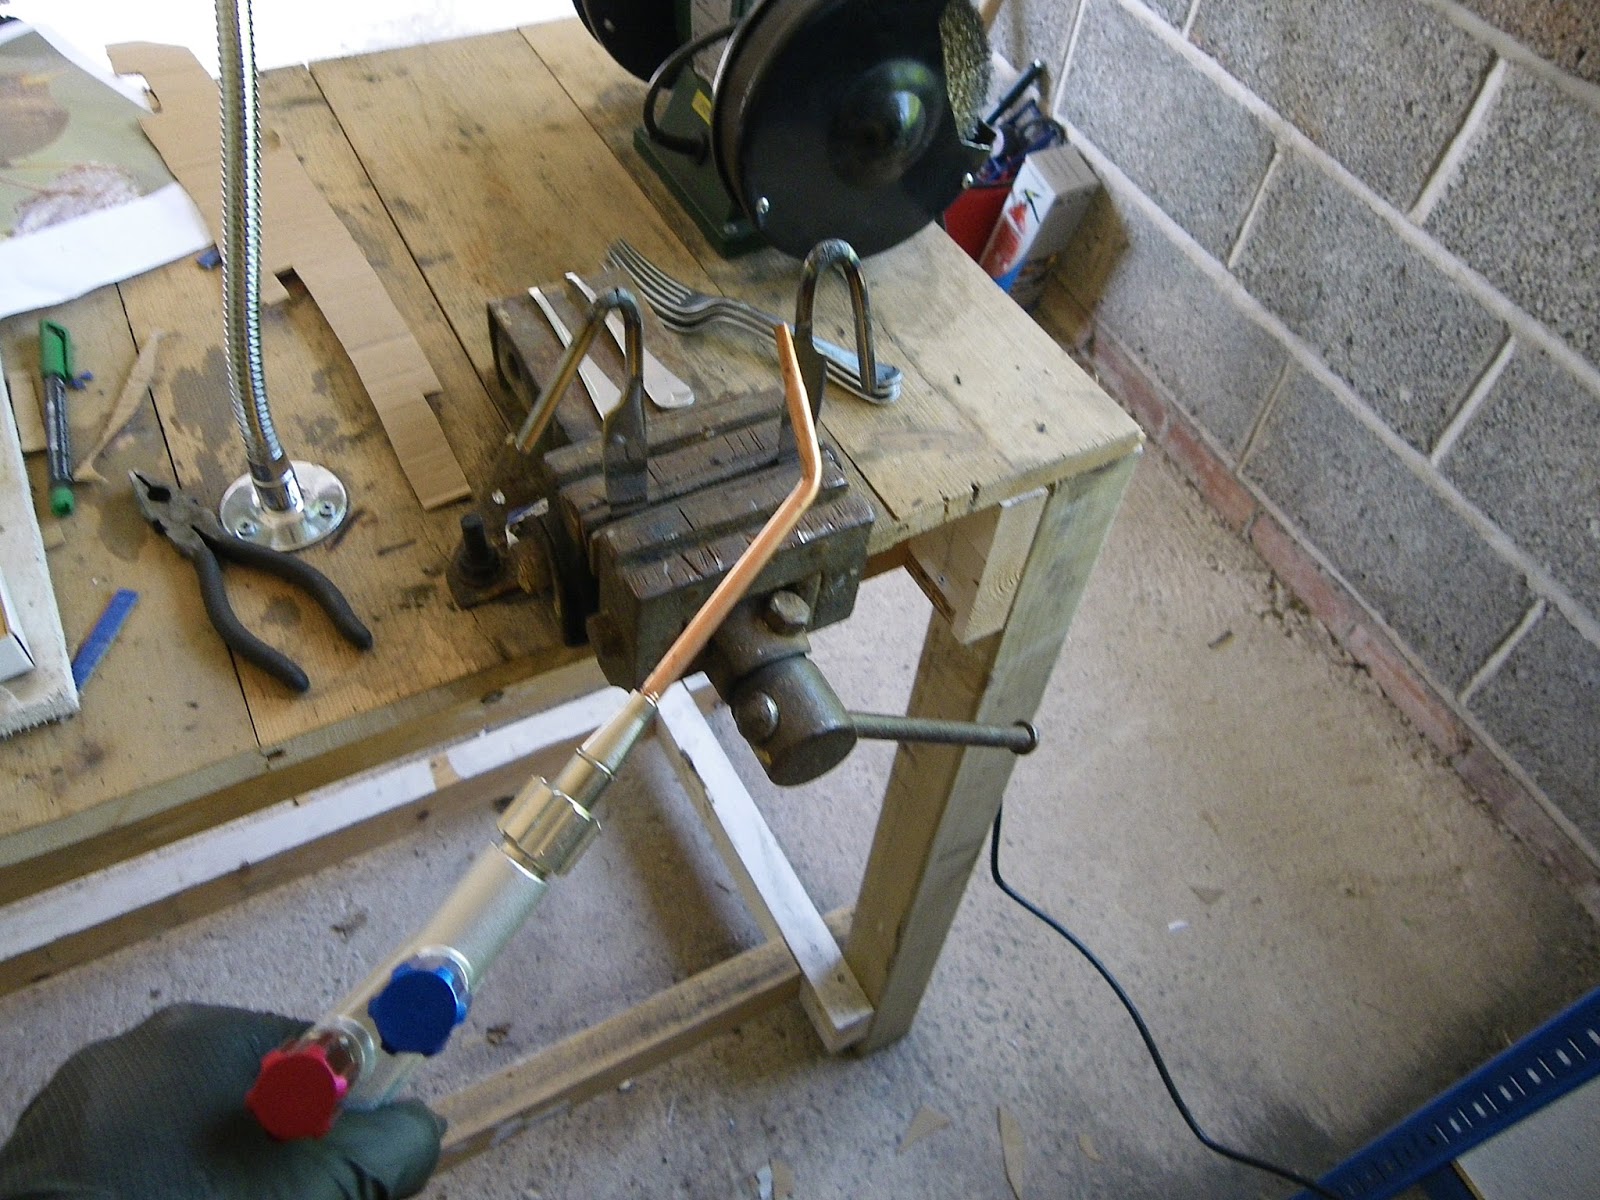
Creating the wings. Here I am using a gas torch. It comes in very handy when bending thick knife and fork handles. |
![](https://blogger.googleusercontent.com/img/b/R29vZ2xl/AVvXsEi9F8SYs6Ef63DfnaCi1w1ynjVnSGRwEVqwVrLVZWdECG4ea_6pCM6mLW5y1yVf4vXcMGSUq8yDQD7uNp-OcAe7bZbN6xEvZu6Dg2jPJ4qhBZp33XE9myJdIQRUL23MAhtXab5XISi2Zd8/s640/IMGP0020.JPG) |
I am comparing the new wren with the old wren. I will also work out the position of the wings. |
![](https://blogger.googleusercontent.com/img/b/R29vZ2xl/AVvXsEjel-lVC05ttAM4SggVeU7QD0Fy0Ye5Rby91MIL4GdKqjlUE4rjoLYEVfv2sS5xZQ2-2ix4xpIeyOKFDF_1-2JZ6593myLjsZV6NYmdagOugfm0Bl7dUwYQcc_RQ9EgxuWVrxSsHG-vIIU/s640/IMGP0021.JPG) |
Wing assembly. I am using a fork for the fine wing feathers. and a knife for the long feathers. Cloth pegs make very good clamps. |
Attaching the wings.
![](https://blogger.googleusercontent.com/img/b/R29vZ2xl/AVvXsEi02GH4-YRTMQHVTVQCeNTN01-cagYTSjfHQKakVgR0j0RTT2JCHXwQn5UvaeapZeHaTBzKcIUDFHiny-xH0k-kjYDnsPXXmFMSBjhXia5_0vx2FjeGk4BdFSK5w1xuBxlW7nUGXt9xxNI/s640/IMGP0024.JPG) |
Almost there. |
![](https://blogger.googleusercontent.com/img/b/R29vZ2xl/AVvXsEgSXAiUk5OT9txL8flqkJwi8VuoB_9Y9T4ThIlTrcFBr8On57uweD88j6F4ShFJ0DWTzNt5ry4piQr5EqnJ_5SFBaNH4Wx6CKh3PuS2YtxW9UYTDFFDUfVTIUlLDe1853KqTMtvVwuW04g/s640/IMGP0025.JPG) |
Wren complete. |